How to create Image Radio Buttons for Advanced Custom Field
Recently I started working on modal plugin because haven’t found any of the free plugins that work. One of the features i wanted was a “layout” choice.
Here’s the end result, I’ll go over how I did this:
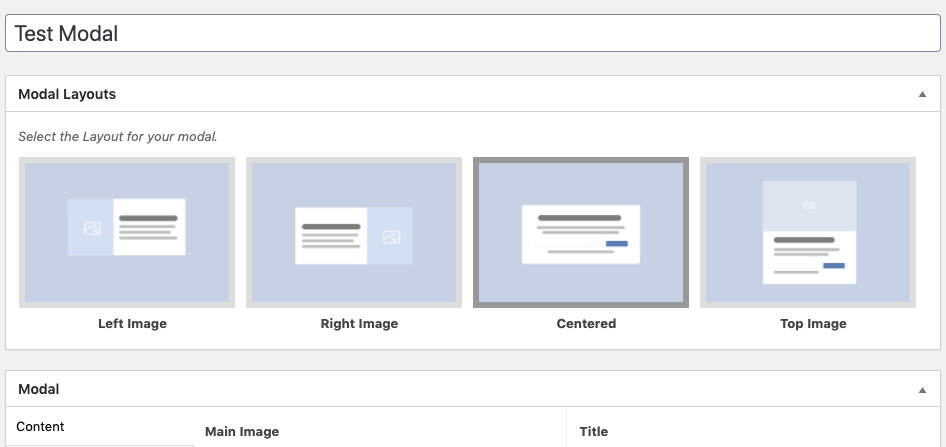
Adding The images
First Things first, you need to have your images already created and uploaded to your theme or plugin directory.
Once the images are uploaded, create a radio button field in Advanced Custom Field. Below is a screenshot of some of the settings:
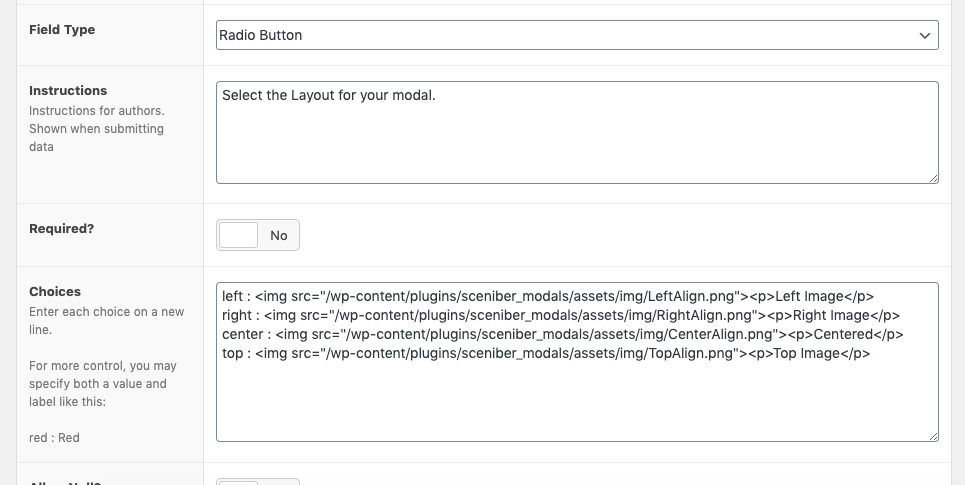
The amazing feature about ACF radio buttons is that they allow HTML in the choice field. So we set our on the left side of the colon. On the Right side, We add an in our Images, and then our Label for each.
In my case, I’m creating a plugin, so the Path to the images points to the images in my plugin folder.
left : <img src='/wp-content/plugins/PLUGIN_NAME/PATH/TO/image.png'><p>Left Image</p>
Styling the Radio Buttons
Now, that is technically all you need to add the images. However, It will look absolutely horrible. To style them into a nice row we need to do 2 things:
- Put a wrapper around our Custom Image Radio Buttons
- Enqueue custom CSS on the admin side to style the buttons.
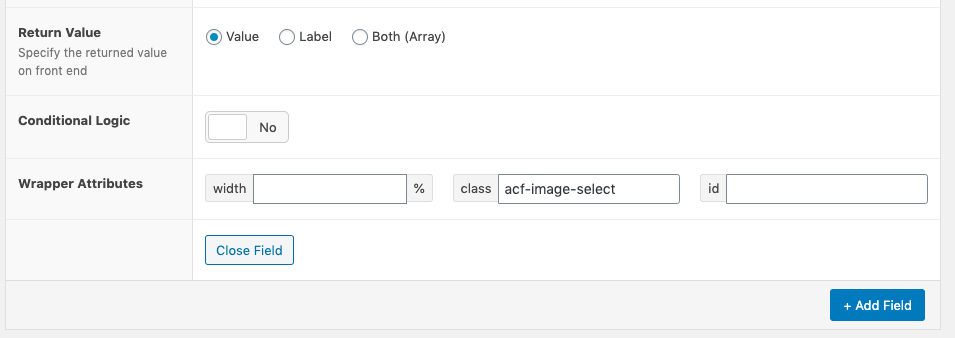
Thanks to ACF, adding a CSS wrapper class is super easy. On the settings page for your fields, towards the bottom there are wrapper settings: width, class, id. We’re going to set the class to something unique that we can target like acf-image-select.
Now that we have the wrapper class set, we’ll enqueue our own styles into the backend. There are a few ways to do this:
- Dedicated style in your theme or plugin that enqueued into the admin area.
- A PhP script that injects a <style> tag into the admin area.
.acf-image-select label input {
    display: none;
}
.acf-image-select label p {
    margin: 0;
    font-weight: bold;
    text-align: center;
}
.acf-image-select label img {
    border: solid 6px #ddd;
    max-width: 90%;
}
.acf-image-select label.selected img {
    border: solid 6px #999;
}
.acf-image-select li{
    display: inline-block;
    list-style: none;
    max-width: 25%;
}
To recap the CSS above:
- We hide the traditional circular radio button
- Have the image we want take up 90% of the width (so that there is padding on the left and right)
- A border to easily tell which option is selected.
- Each <li> has a max of 25% (since I only had 4 options, you could do some flex or CSS grid to make it more versatile for more options)
Once you have your CSS file created and those styles above saved, you can load it into the admin area like this:
function sce_admin_styles() {
	//if Using in a plugin
    wp_enqueue_style( 'PLUGIN-admin_styles', plugin_dir_url( __FILE__ ) . 'assets/modal-admin.css');

	//if Using in a Theme
    wp_enqueue_style( 'THEME-admin_styles', get_template_directory_uri() . '/assets/admin-styles.css');

}

add_action( 'admin_enqueue_scripts', 'sce_admin_styles' );
That should be everything you need to create fancy image radio buttons! If you have problems with this or I have a typo, hit me up on twitter. Thanks everyone!